Sunday, December 19, 2010

Fire Agate - A Unique and Beautiful Stone

Fire Agate - A Unique Beauty
In today's post I thought I would talk about what has definitely become one of my favorite stones - fire agate.  Fire agate is mined in the southwest United States and Mexico.  Arizona
mines have produced some of the most colorful and brilliant fire agates.  

Fire agate is named for its ability to reflect light back to the eye like flashes of fire.  It is actually a form of quartz, specifically the Chalcedony variety.  Fire agate stones are formed during volcanic events and eruptions during which micro-thin layers of bubbles and sheets form in a rainbow of red, green, yellow and blue colors.  These colors are then refracted back to the eye with fiery flashes of dazzling brilliance!  Because of their crackled appearance, they are also sometimes referred to as "crackle agate."

Fire agate is not particularly well known despite its amazing beauty.  Describing fire agate is very difficult as it is impossible to capture its full beauty and essence in a written description.  But gazing into a beautiful fire agate can be compared to gazing deeply into a burning ember.  There is simply no other stone that has this amazing quality!  It has been said that fire agates are brighter and more beautiful than opal - and I happen to believe this to be true.

To truly appreciate the unique beauty of fire agate, one must hold it and look at it.  As difficult it is to provide an adequate written description, capturing the beauty in a photo is equally challenging!  Still, here is a link to some photos of some beautiful fire agate stones at differentseasons.ganoksin.com/blogs.

And here are a few of the beads I purchased at the recent bead show I attended:
Fire Agate Beads
And here is a finished necklace I created using a beautiful "red hot" fire agate for the pendant:
"Red Hot" Fire Agate Necklace


Close-up view of fire agate pendant

In closing, fire agate is an absolutely amazing stone.  I have only created a few designs using them but am itching to make more.  Visit my shops to find some of my designs:
DJAjewels.etsy.com
DJAjewels.artfire.com


Helpful links:


Sunday, December 12, 2010

Are You Finished with Your Christmas Shopping?

Just wondering how many people have actually finished their Christmas shopping by now.  I am writing this post on December 12 - so there are 13 days left till Christmas!

Well, I have yet to start - have actually delegated the task to my husband this year for the second year in a row.  It worked out very well last year - he went out in one day and finished the task splendidly.  I think men do a lot less deliberating when shopping than women - they "see and buy."  Don't get me wrong - he actually did make a list before going, and he stuck to it pretty well.  The difference is that when I make a list, I stick to it in more general terms.  If I'm going after a coffee maker for my mom, for instance - I might check out 10 or 15 different ones - and I might go to two or three stores before settling on the "right one."  He just "sees and buys" the first or second one he comes across.  But you know, I like it - less work and hassle for me - and he seems to enjoy it.

I'm interested in knowing - how do other people handle their Christmas shopping?  Drop a note and let me know!

Sunday, December 5, 2010

About Turquoise


With December now here I decided to take the time to learn a bit more about this festive month's birthstone.  The traditional birthstone for December is turquoise although in modern times other gemstones such as blue zircon and blue topaz are also included.  Turquoise is a beautiful gemstone and is often paired with sterling silver.  It also pairs well with contrasting stones such as coral as in the earrings I made below:
Lampwork, Coral and Turquoise Sterling Silver Earrings


About turquoise: Colors range from sky blue to blue-green to apple green.  Pure blue colored turquoise is the most rare and most valuable.  Most stones, however, will have brown, dark gray or black veins of other minerals called matrix.  Matrix are actually deposits of other minerals such as iron found in the rock that the turquoise formed in.  Turquoise is mined in Afghanistan, Argentina, Brazil, China, Iran, Israel, Mexico, Tanzania, and the U.S.  Turquoise has been a treasured gemstone by many cultures for many centuries.

History of turquoise: Ancient Egyptians favored turquoise for their Pharaohs.  Ancient Chinese culture placed turquoise second only to jade. It was also very popular during the Victorian era in Europe.  Native Americans mined and cut turquoise to create beautiful jewelry centuries before the European settlers first arrived.

Legend & Folklore: According to folklore, turquoise is a good-luck charm and promotes good fortune, happiness and a long life.

Types of turquoise (in order of value):
Natural turquoise:  This is the most valuable and most expensive form of turquoise.  The most perfect and hardest stones are taken directly from the mine, then cut and polished without any further treatments or compounds being applied.  Natural turquoise is usually a vivid blue with a fine pattern and distribution of veins.  Natural turquoise represents less than 3% of the world market.  Natural turquoise jewelry will deepen in color as it is worn over time when oils from the skin are gradually absorbed into the stone.

Stabilized turquoise:  This is one of the most common forms of turquoise used in jewelry today.  It is less expensive than natural turquoise but is still very beautiful and more valuable than dyed turquoise (as described below.)  Stabilizing is a process applied to moderate to lower quality stones that have a softer and more porous surface.  These stones are stabilized by infusing them with a clear epoxy resin which hardens the surface and enhances the color.  Unlike natural turquoise which deepens in color over time, stabilized turquoise has a permanent color because of the hardened surface.

Treated turquoise:  This form of turquoise is dyed in addition to being stabilized as described above.  The dying of the stone can result in a somewhat artificial appearance.  Treated turquoise is less valuable and less expensive than stabilized forms.

Reconstituted turquoise:  Often called chalk turquoise, this is the least expensive form of turquoise.  Very soft lower grade chalk turquoise is ground into a powder.  An epoxy resin and dye is applied to the powder which then forms into a thick paste.   It is then pressed into forms and molds and allowed to harden.  Finally it is cut and carved into various shapes and sizes for jewelry making.  This form of turquoise is typically easy to identify  because it usually lacks the characteristic veins or matrix; beware however since some manufacturers have now begun to use resins to simulate the matrix found in natural and stabilized turquoise. 

Synthetic turquoise:  This is actually not turquoise at all but other stones, bone, ceramic or even plastic that has been dyed to look like turquoise. 
Remember,  a reputable dealer will provide a description of the type of turquoise being sold!
Sleeping Beauty Turquoise:  Sleeping Beauty turquoise is mined from The Sleeping Beauty Turquoise Mine in Arizona.  It is one of my favorite turquoise varieties!  Sleeping Beauty Mountain, where this mine is located, was once a gold and copper mine but is now used to mine some of the best turquoise in the world.  Sleeping Beauty turquoise is an intense vivid blue containing little to no matrix.

If you would like to see some great photos of Sleeping Beauty and other turquoise varieties, check these photos out I found on a site called rock-n-cabs.com.

Friday, November 26, 2010

My First Bead Show

Last weekend I attended my first Bead Show :  Intergalactic Bead and Jewelry Show in Charlotte, NC.  It was nothing short of spectacular!  It was somewhat overwhelming deciding what to buy and what to leave behind.

I usually buy my beads online where I can shop around comparing prices and quality.  But I have to say, being able to see and touch the beads before buying was a dimension I really appreciated.

Here is a photo of my stash when I first came home before organizing and pricing each bead - I always calculate the price of each bead or component and label it so that when I design a piece of jewelry I can calculate my cost and then an appropriate sale price.
My Gemstone Stash of Treasure (before sorting)
I felt a bit like I was sorting through a treasure chest counting beads on each strand and sorting them out - and I enjoyed every minute of it!  Examining each bead and enjoying the fine job nature does when creating gemstones was an absolute pleasure.

I absolutely fell in love with fire agates through this show.  They are an incredibly beautiful gemstone with all kinds of variations.  Here is a photo of a necklace I designed this week using a blazing red fire agate for the pendant and smaller fire agate rondelles for accent:
Red Hot Fire Agate Pendant Necklace
Close-up View of Fire Agate Pendant
Of course I have so many stones still awaiting their place in a jewelry design.  Can't wait to help them find their new home!

You can find all my jewelry designs at:
DJAjewels.etsy.com
and
DJAjewels.artfire.com

Sunday, November 7, 2010

The Steampunk Revolution

There is no doubt about it - steampunk jewelry has leapt in popularity over the last few years.  Steampunk really began to pick up steam - pardon the pun - in the early 2000's although it had been around even before then.  Google Trends took note of the steampunk movement in 2006 and noted a steady gain in popularity since then.

What is steampunk?  Science fiction writer H.G. Wells -often referred to as "the father of science fiction" - coined the term in 1987 as a way of describing his works and those of his contempories such as Jules Verne.  Initially the phrase referred specifically to Victorian science fiction and fantasies, but over time an entire subculture emerged to include jewelry, art, fashion and even music.

Steampunk jewelry blends the femininity of the Victorian era with the mechanical technology that emerged during this time.  Most steampunk and neo-Victorian items use dark non-shiny metals such as brass and gunmetal giving these pieces an antique vintage style appeal.  Steampunk jewelry is often handmade giving it a feeling of uniqueness.  Many jewelry and craft artists sell their steampunk designs on sites such as Etsy and ArtFire.

Supplies used to create steampunk designs include items such as filigree stampings, watch faces and watch parts, vintage jewelry components, skeleton keys and vintage keys, and almost any gadget or mechanical part.   Each piece is usually unique combining and layering different components.

To see fantastic examples of steampunk jewelry, view this ArtFire Collection entitled Steampunk Fantasy!


Helpful links:
http://www.squidoo.com/steampunkart
http://www.suite101.com/content/what-is-steampunk---a-guide-to-the-definitions-a237194
http://www.ehow.com/about_5082813_steampunk-jewelry.html

Wednesday, November 3, 2010

Celebrate November with Topaz Jewelry

Topaz is the birthstone for November, so I decided to welcome the month of November with a post about this gemstone.

The name "topaz" originated from the Sanskrit - an Indian language of Hinduism and Buddhism.  It means "fire."  Jupiter "god of the sun" was associated with topaz by the Romans.  with topaz Most people think of topaz as an orange-yellow to brown color, but it also is found in hues of peach, pink, blue and clear.  Brazil is a major supplier for the world's supply of topaz, but deposits are found throughout the world including the United States.

During the ancient and Middle Ages, topaz was thought to have protective and healing powers. Even today, many people wear topaz because it is thought to have healing and rejuvenating powers and have the ability to increase wealth and wisdom.

Glass replicas of topaz are worn today in many jewelry designs and can be stunning!  One example is this "Topaz Glass Gem Pendant Necklace" I have listed on Etsy:
Topaz Glass Gem Pendant Necklace
For more beautiful examples of topaz jewelry - both gemstone and glass gems replicas - check out this Etsy Treasury!


Links and references I used to find information about topaz:
MineralMiners
Bernardine Fine Art and Jewelry
AddMoreColorToYourLife

Sunday, October 24, 2010

Tutorial For Making Beaded Wine Charms


Making Beaded Wine Charms
Every Christmas Holiday season I receive lots of orders for my beaded wine charms.  These are one of my favorite - and actually easiest items to create.  The possibilities are endless for themes, colors and materials.  These charms are great for dinner parties and entertaining - helping your guests keep up with their glass - and making nice conversation pieces.  They also make great hostess gifts!


This tutorial will show how I make my beaded wine charms.

Materials: 

  • Beads of your choice 
  • Charms
  • Wire hoops (I use 25mm earring wire hoops)
  • Small jump rings to attach the charm to the hoop - or headpins for converting a bead into a   charm with its own loop using a wrapped loop technique
  • Round nose and needle nose pliers


Instructions:


1.  Choose your wire hoop.  This tutorial uses a 25mm gold-plated wire hoop.
25mm Gold Plated Wire Hoop
2.  Place beads and charm onto wire hoop.  For these charms I made my own charm using beads and a headpin which I wire-wrapped to form a loop for sliding onto the charm.  You can also use ready made charms - available in a wide variety of materials and themes.
Wire Hoop with Beads and Charm


3.  Form a closure for the hoop so that the beads and charm does not fall off.  The wire hoop has one end with a loop and one straight end.  Working on the straight end, use your round nose pliers to bend the end up to make a 90 degree angle.
Wire Hoop with 90 Degree Angle Closure

4.  Some people stop with step 3 but I prefer to finish the closure by using my round nose pliers to bend the tip of the hoop backwards to form a u-shaped closure.  To do this, grasp the tip of the bent up portion of the hoop end and bend it backwards over the top of the pliers tip.
Wire Hoop Finished with U-Shaped Closure
5.  Voila!  You now have a perfectly finished wine glass charm.
Finished Wine Charm
6.  Make as many as you want for a set - four, six, eight or more!
Set of Six Beaded Wine Charms

You can find more of my beaded wine charms in my Etsy shop!


Sunday, October 10, 2010

History of Pandora and Pandora Style Jewelry

Pandora Style Rose Chintz Bracelet
By DJAjewels


I recently have made a couple of the popular "Pandora Style" bracelets.  Although they are not a big part of my line, I felt the need to at least design a couple of pieces because of their immense popularity.  And so, I became interested in the origins of the Pandora® jewelry line.

Pandora style jewelry is also called "European Style" jewelry because the Pandora line originated in Denmark and was initially a European trend.  Pandora introduced its first bracelet in Denmark in 1999, and the style quickly became popular across Europe.  By 2002, the brand arrived in the United States where its popularity also quickly spread.

The name for the Pandora® line was inspired by Greek mythology goddess Pandora.  Of course, now there are many "Pandora Style" designs not made by Pandora® but created in the same or similar style.  It is important to recognize whether you are purchasing an actual Pandora product or a design inspired by their line.  An actual Pandora® piece of jewelry is, of course, going to cost more than a "Pandora inspired" piece.

The unique style of Pandora® and Pandora inspired jewelry allows the wearer to create a unique design by choosing individual charms and beads.  The design is customizable as beads can be added, removed, moved about on the bracelet.  The design can be completely individualized because the clasp/closure allows the large hole beads to be added and removed so easily.

So whether you are looking for an actual Pandora® piece of jewelry or want to experiment with a Pandora style piece, go ahead and have fun creating your own original design.  There are many sellers on ArtFire, Etsy and elsewhere that offer a wide variety of beads and components. You can also purchase a fully beaded design - for a look at my designs, click here!

Sunday, October 3, 2010

ArtFire Versus Etsy

This post is a follow-up to my last one on the ArtFire Group Deal.  I did opt in and I became a Pro Member as of October 1, 2010.  I now have my shop up and going and fairly well stocked with just under 50 items.

I continue to operate my Etsy shop and will likely continue to sell in both venues.  I have to say, however, the ArtFire platform is very user-friendly and has some features I really like that Etsy does not offer.  For example, I can create "coupons" for customers to use to receive discounts.  I can also mark individual or multiple items for "sale" with price markdowns.  I can even create gift certificates.  I can also show a link to my Etsy shop in my ArtFire shop - not permitted on Etsy.  I can also show 10 pictures of an item versus 5 on Etsy.  And my overhead is less selling on ArtFire's site as well!

Still, Etsy is not a bad place at all.  It certainly contains a thriving community of talented and interesting artists.  It is also very well known and has a large following of customers.  The selling platform is simple to use and easy to upload items for sale.  Visibility is Etsy's strength, however since it is still the best known site for handmade items.

Still,  ArtFire is coming on strong and with all its perks and low fees, it's market presence is steadily growing.  So for now, I will continue on with both shops.  It might be that I eventually settle on one or the other.  Or I might find that I want to divide my inventory of designs and sell one type on Etsy and the other on ArtFire.

Please check out both my sites - feedback and comments are welcome!

DJAjewels.etsy.com
DJAjewels.artfire.com

Monday, September 20, 2010

ArtFire Group Deal for $5.95 Per Month

Last week ArtFire rolled out a huge promotion - if they can get 20,000 people to sign up for a Pro account, those people can lock in for a lifetime rate of $5.95 per month.  Up to 50,000 people can sign up - then the ArtFire Group Deal is gone.  So far, over 4000 people have signed up.

Apparently $5.95 per month is all you'll pay - there are no listing or transaction fees!

Signing up costs nothing - if ArtFire fails to reach the 20,000 people minimum (which is unlikely) you owe nothing.  What if you sign up and later decide to cancel? You are only obligated to pay a one month subscription fee at the $5.95 rate before canceling.

This is a no lose offer for me!  Now having said that, I have had a basic ArtFire account for about a year and have not enjoyed the same amount of sales as on Etsy - but truthfully I have not put the same amount of energy into my ArtFire shop as on Etsy.  With this offer, I feel the need to give ArtFire a real try.  So yes, I have opted in for this great deal from ArtFire.

Click here if you want to know more about the ArtFire Group Deal.

I would love to hear others' thoughts and views on this deal!

Saturday, September 18, 2010

Autumn Hues

Just finished my newest creation today - this "Art Nouveau Glass Topaz Pendant" is my first item this year inspired by fall:

Art Nouveau Glass Topaz Pendant


So I took it one step further and put together an "Autumn Hues" Treasury on Etsy with spectacular creations from some really amazing and talented artisans.

Go ahead, sit back and check out these autumn treasures:
"Autumn Hues" Treasury on Etsy

Wednesday, September 15, 2010

How to Offer Multiple Shipping Options on Etsy

I have always wanted to offer more than one shipping option for my Etsy customers.  Currently Etsy is not equipped to offer more than one option.  But did you know you can offer multiple shipping options through PayPal during checkout?  Here's how:
  1. Sign in to your PayPal account.  At the top of your page on the line beneath "My Account" select "Profile.
  2. You will be taken to another page - look for "Hosted Payment Settings" and select "Shipping Calculator."
  3. You can then set up your shipping options for both Domestic and International.  You can determine whether to charge based on total order amount, shipping weight, or number of items.  You can even have a "Free Shipping" option based on your pre-set criteria.
  4. IMPORTANT:  At the end of the set up process there is a box that says "Use the shipping fee in the transaction instead of your calculator settings."  Leave this box blank so that the customer will have a choice of shipping options.  Otherwise, PayPal will default to the shipping charge set in your Etsy listing.
Be sure to explain your shipping policies in the POLICY section of your Etsy shop.  Here is my shop's explanation:  DJAjewels Shop Policies.

I hope this post is helpful for other sellers who would like to offer shipping choices for their Etsy customers.  Feedback is welcome!

Monday, September 13, 2010

Do You Belong to SRAJD?

Today I joined the  organization "SRAJD" (Self-Representing Artists in Jewelry Design.)  It is something I have been curious about for a while as I have taken notice of other jewelry designers who have joined.  It certainly sounds like a credible organization and one that I hope will lend credibility to me as a jewelry designer.

I am interested in knowing what kind of benefits other members have found in belonging to this organization.....and what other organizations you might belong to that have helped you along the path in jewelry design.

So fellow jewelry designers - let me hear your feedback!

And if you want to join SFAJD, here is the link:  SRAJD

Sunday, August 22, 2010

Filigree and Gemstone Jewelry

I continue to be fascinated with the versatility of filigree in creating Victorian and vintage style jewelry.  Layering filigree can add such depth and visual interest to a piece of jewelry.  When combined with natural gemstones, the effect can be dramatic!

I purchased the gemstones used in the pieces shown below from Etsy shops:
CabbingRough
BrownChalcedony

The first necklace features a stunning green chalcedony round cabochon from Turkey (bought from BrownChalcedony.)  I used a layering technique by mounting the stone onto an antiqued silver setting and antiqued silver filigree for the back, allowing the edges to show around the edges from the front.  Necklace is beaded with natural gemstone and glass garnets, antiqued silver beads and chain.  Necklace length is 18 inches.

Green Chalcedony and Garnet Filigree Necklace
The second necklace uses a square green chalcedony cabochon (also from BrownChalcedony.) For this design I wrapped the stone in antiqued silver filigree then mounted it onto another piece of round filigree and embellished the front with a small Swarovski crystal "fire opal" rhinestone.  Necklace beaded with strands of antiqued silver links and filigree beads and small Czech glass crystals.  finished with delicate antiqued silver chain and lobster claw clasp closure.  Measures 16 1/2 inches.

Green Chalcedony Antiqued Silver Filigree Necklace - View 1


Green Chalcedony Antiqued Silver Filigree Necklace - View 2
The last necklace features a beautiful pink jade stone from CabbingRough.  This exquisite stone has hints of green mixed with the pink and rose colors.  I mounted the cabochon into an antiqued silver setting, then wrapped it with antiqued silver filigree to form a beautiful pendant.  Necklace beaded with Czech glass beads and anituqed silver bead caps.  Glass beads are combination of faceted pink rondelles with gold highlights and fluted round smokey gray in AB (aurora borealis) finish.  I made the beaded filigree drop with a aclear Swarovski crystal teardrop, then wrapped it in antiqued silver filigree.  Chain is delicate antiqued silver.  Finished with a lobster claw clasp.  Measures 18 1/2 inches, plus pendant drop of 2 inches.

Pink Jade and Antiqued Silver Filigree Necklace - View 1


Pink Jade and Antiqued Silver Filigree Necklace - View 2


Be sure to visit my Etsy shop to find more filigree Victorian and vintage style jewelry!

Wednesday, August 18, 2010

How to Make Beaded Wine Glass Charms

Making your own wine glass charms is not hard at all.  Follow these instructions and you can design and create your own personalized wine glass charms in no time at all.

Materials:  Beads of your choice,, wire hoops (I use 25mm earring wire hoops which I purchased from Fire Mountain Gems - available in silver and gold-plating), and round nose pliers.  You will also need either small jump rings to attach the charm to the hoop - or headpins for converting a bead into a charm with its own loop using a wrapped loop technique.
Instructions:
Wire Hoop
1.  Choose your wire hoop.  This tutorial uses a 25mm gold-plated wire hoop.


Beading the Hoop
2.  Place beads and charm onto wire hoop.


Forming the Closure


3.  Now you need to form a closure for the hoop.  The wire hoop has one end with a loop and one straight end.  Working on the straight end, use your round nose pliers to bend the end up to make a 90 degree angle.


Finishing the Closure


4.  Some people stop with step 3 but I prefer to finish the closure by using my round nose pliers to bend the tip of the hoop backwards to form a u-shaped closure.  To do this, grasp the tip of the bent up portion of the hoop end and bend it backwards over the top of the pliers tip.


5.  Voila!  You now have a perfectly finished wine glass charm.  Now complete your set by making several more - you can choose to have four, six or even eight in a set.

Click here to see my collection of beaded wine charms on Flickr!

(This post uses information  from a blog post I  wrote for my Wordpress blog.)


Wednesday, July 21, 2010

The Power of Peridot

What is Peridot?  Peridot is a bright green to yellow-green gemstone and is the birthstone for August.  The major world supplier for peridot is the United States with the majority of mines being located in Arizona, and some in New Mexico.  While mines in the U.S. produce large amounts of peridot, the finer, more rare and higher quality stones are mined in Myanmar, Egypt and Pakistan.

History and Folklore:  Cleopatra was known for her love of peridot, and it has been said that some of her "emeralds" were actually peridot.  According to legend, peridot possesses magical powers to protect against evil, calm anger, repel negative thoughts, and attract love.

Wearing Peridot:  The tranquil green color of peridot makes it particularly suitable for wearing in the summer months.  Both gold and silver compliment the stone nicely.  It is generally a pleasant, lightweight jewel that can be worn on a casual everyday basis, but can just as easily adorn your evening wear as well.

In addition to actual peridot gemstones, many beautiful pieces of jewelry can be found using glass replicas of peridot.  Check out some of these beautiful peridot gemstone and glass jewelry items created by various Etsy artisans that I organized into an Etsy treasury entitled  Peridot Perfection.


The earrings below are an example of using a combination of peridot glass gems and actual peridot gemstones:

Green Lampwork and Peridot Earrings


Tuesday, July 6, 2010

Fabulous Filigree

These past few weeks I have been learning about using filigree in jewelry designs.  What I have learned is that it is a fantastic way to showcase jewels of all kinds such as glass and gemstone cabochons.

What is filigree?  It is an ornamental type of jewelry using open lacy type designs.  Gold, silver, brass or other metal "wires" are soldered together into intricate designs.  Learn more about filigree on Wikipedia.

I have been using antiqued silver and brass filigree stampings from VintageJewelrySupply.com.  Their products are high quality, reasonably priced and shipped quickly.  Be sure to also check out their sister site FiligreeJewelrySupplies.com which has some excellent tutorials for learning how to use filigree.

Here are some of my first designs using filigree:

Sapphire Blue Glass Filigree Necklace
This necklace features a beautiful faceted glass gem cabochon wrapped in oxidized silver plated filigree.  Embellished with a smaller antiqued silver stamping and "fire opal" Swarovski crystal in the center.  Matching stampings and crystal rhinestones are used to attach the pendant to double stranded antiqued silver chain.


Mexican Glass Fire Opal Necklace
A gorgeous glass fire opal is securely wrapped in an antiqued silver filigree piece.  Center has a small "fire opal" Swarovski crystal.  I finished the back with an antiqued pewter earring finding that fit the piece perfectly (see third picture below for back of pendant.)  Necklace is finished with links made with Swarovski crystals in dark red coral, antiqued silver bead caps, and antiqued silver chain.


Red Glass Filigree Pendant
I made this pendant using a 15mm round glass cabochon in a color called Rosaline which is a rich rosy red color.  I then used two antiqued silver stampings to wrap the stone so that the back and front actually look alike except that the back shows the flat foiled back of the stone.  Pendant is connected to antiqued silver chain with links beaded with Swarovski crystals in "black diamond" and dark grey Swarovski crystal pearls.


Antiqued Brass and Glass Gem Necklace
This pendant features another sapphire blue glass gem cabochon like the one in the first item above but I used antiqued brass instead of silver.  I used four pieces of antiqued brass stampings to wrap and layer around the edges of the stone, then embellished the center with a  round filigree stamping and clear AB finished rhinestone.  Pendant hangs from a medium 5mm link rollo chain in antiqued brass.


Antiqued Brass Filigree Heirloom Necklace
This necklace has a large round clear faceted glass gem set into a beaded edge four prong antiqued brass setting.  It was pretty just like that, but I embellished the pendant with several layers of antiqued brass stampings.  Center has a round filigree stamping with a clear AB finished rhinestone.   A Czech glass teardrop is hung from the bottom of the pendant.  Pendant hangs from an antiqued brass rollo chain.


Victorian Filigree Heart Earrings
These earrings feature antiqued brass filigree stampings and Czech glass teardrops.  I wire wrapped the teardrops using antiqued bronze wire.  Dangles hang from antiqued brass fish hook earring wires.


Antiqued Silver and Mexican Fire Opal Pendant Necklace
For this pendant I used a genuine Mexican opal cabochon and wrapped it like a tiny treasure in two antiqued silver filigree stampings.  I used no other decoration, just hung it from a delicate antiqued silver chain.


With the exception of the last item above (which I am thinking of keeping for myself), all of these pieces can be found in my Etsy shop:  DJAjewels.etsy.com

Saturday, June 26, 2010

Another Glass Fire Opal Design


I am still enjoying my newest fascination with glass fire opals.  For my newest creation I used a topaz glass opal with a rich warm mix of gold, amber and topaz colors.  I created a setting for this stone using a simple round mounting which I layered with a more ornate round setting - both in antiqued brass.  Czech glass beads in clear fire polish and "vintage bronze" add to the vintage style charm of this piece.  A medium weight 5mm rollo textured chain gives this piece a substantial feel.  Measures 18 inches long.  Finished with an ornate antiqued brass pewter hook and eye clasp.


I found this stone and several of the metal components at VintageJewelrySupplies.com.  Remaining components are from firemountaingems.com.

This necklace is available in my Etsy shop DJAjewels.etsy.com.

Wednesday, June 23, 2010

Glass Fire Opal Jewelry

Glass fire opals are some of the most beautiful man-made stones I know of.  Also known as Harlequin glass art, they are known for their fiery  play of colors.  Glass fire opals come in various colors.  Please remember these pieces of glass art are not really opals.

The most well-known are the Mexican fire opals - also known as Dragon's Breath.  These beautiful glass stones have mixtures of red, orange, and yellow colors.  When light passes through these transparent glass stones, streaks of blues and purples are seen.  This characteristic is achieved when the glass artisan adds various metals to the molten glass as it is being made.  In fact, the name "Dragon's Breath" originated because of the blue and purple "breath" inside the reddish orange glass - giving the illusion of a dragon's breath.  The first picture below is a Mexican glass fire opal set into an antiqued silver setting.


Glass fire opals are also made in other colors such as topaz, amethyst, blue and green.  The second and third pictures are some examples.  This topaz fire opal has a rich warm mix of gold, amber and topaz colors.  The amethyst piece is an electric mix of pinks, purples and golds.


All three of these necklaces were designed by me and are available for sell in my Etsy shop:  DJAjewels.etsy.com.

Sunday, May 30, 2010

How to Make a Collage Pendant

My latest obsession has become creating collage pendants. The possibilities are endless, but I particularly enjoy vintage and art nouveau themes.

Making a collage pendant is not difficult, but does require some time and thought. Here is the process I use:

Supplies: Image or photo, pendant frame, E-6000 glue, glaze such as Diamond Glaze. You will also need simple tools such as an Xacto knife - or a paper punch, toothpicks or wooden craft sticks, and waxed paper.

1. First select your pendant shape and style - circle, oval, square, rectangle. Decide on either a simple frame or an ornate one with fancy edging. Since I like vintage style jewelry, one of my favorite places to purchase frames is VintageJewelrySupplies.com. This site offers good products at reasonable prices and fast free shipping.

2. Next, select your image to fit the frame. You can use wrapping paper, magazine photos, and greeting cards. Or you can purchase collage picture images already sized and shaped for common pendant frames. I purchase many of my images on Etsy where there is a wealth of styles and themes from various sellers.

3. Prepare your image. If you are printing out a collage sheet or other image from your computer, first be sure to use the best quality settings for your printer. I find printing on photo paper works best. Next seal your image to prevent the ink from running and smearing during gluing and glazing later - I use Aleene's spray acrylic sealer which I purchase at Michael's craft store - you can choose either a matte or glossy finish (both work fine.)

4. Cut out your image. If you are "free styling" (not using a pre-sized and shaped" collage sheet) then make a template of your shape by tracing the shape on a piece of paper - preferably thick cardstock type. Then cut out the shape leaving a circle (or whatever shape you're using) opening in the paper. Then you can place the template over your desired image, trace with pencil and cut it out. I usually leave about 1/8 inch around the edge to trim later - this makes for easier handling. Use a craft knife or xacto knife to cut your image - be careful as they are quite sharp!

A quicker easier method for cutting your image is to purchase a paper punch at a craft store such as Michael's. These come in standard 1 and 2 inch circles, ovals, squares and many other shapes. I recommend this method if you are going to be making a number of pendants.

5. Glue your cut out image to the pendant frame. I use E-6000 glue (I purchase from Michael's) placing a small amount on the back of the image and pressing it onto the frame. Use a toothpick or small wooden pointed craft stick to clean off excess around the edges. But if you leave some E-6000 dries clear and excess can be cut off later with your craft knife. E-6000 becomes tacky in 2 minutes and begins to set in 10 minutes - but takes 24 to 72 hours to fully cure. After drying, you can trim the edges of your paper if needed with your Xacto knife - if you used a paper punch, this step is usually unnecessary.

6. Now it is time to apply glaze to seal and protect the image. Be sure to allow the glue from step 5 to dry sufficiently - I usually allow several hours (4 hours or longer.) Although not fully cured yet, this is enough time for proceeding.

I use Diamond Glaze which can be purchased at various sites on-line. One site I have used is CreateForLess.com but there are many others - even Ebay where this product can be found.

Applying the glaze is a bit tricky but not overwhelmingly so. Place your pendant on a flat surface where it will be able to sit without being disturbed for at least 24 hours. I use a flat chopping board with waxed paper placed on top for easy clean up.

First squeeze out a small dab of the glaze onto the waxed paper to expel any bubbles. Then without turning the bottle back upright, immediately squeeze the glaze onto your image - I start from the center and work my way outward in a circular motion. If air bubbles develop, pop them with a needle or even your fingernail.

Now let the glaze dry and cure. It will be sufficiently dry to carefully move after 24 hours, but takes 72 hours before fully curing. If not fully cured, you can leave smudges and indentations on your glaze with handling.

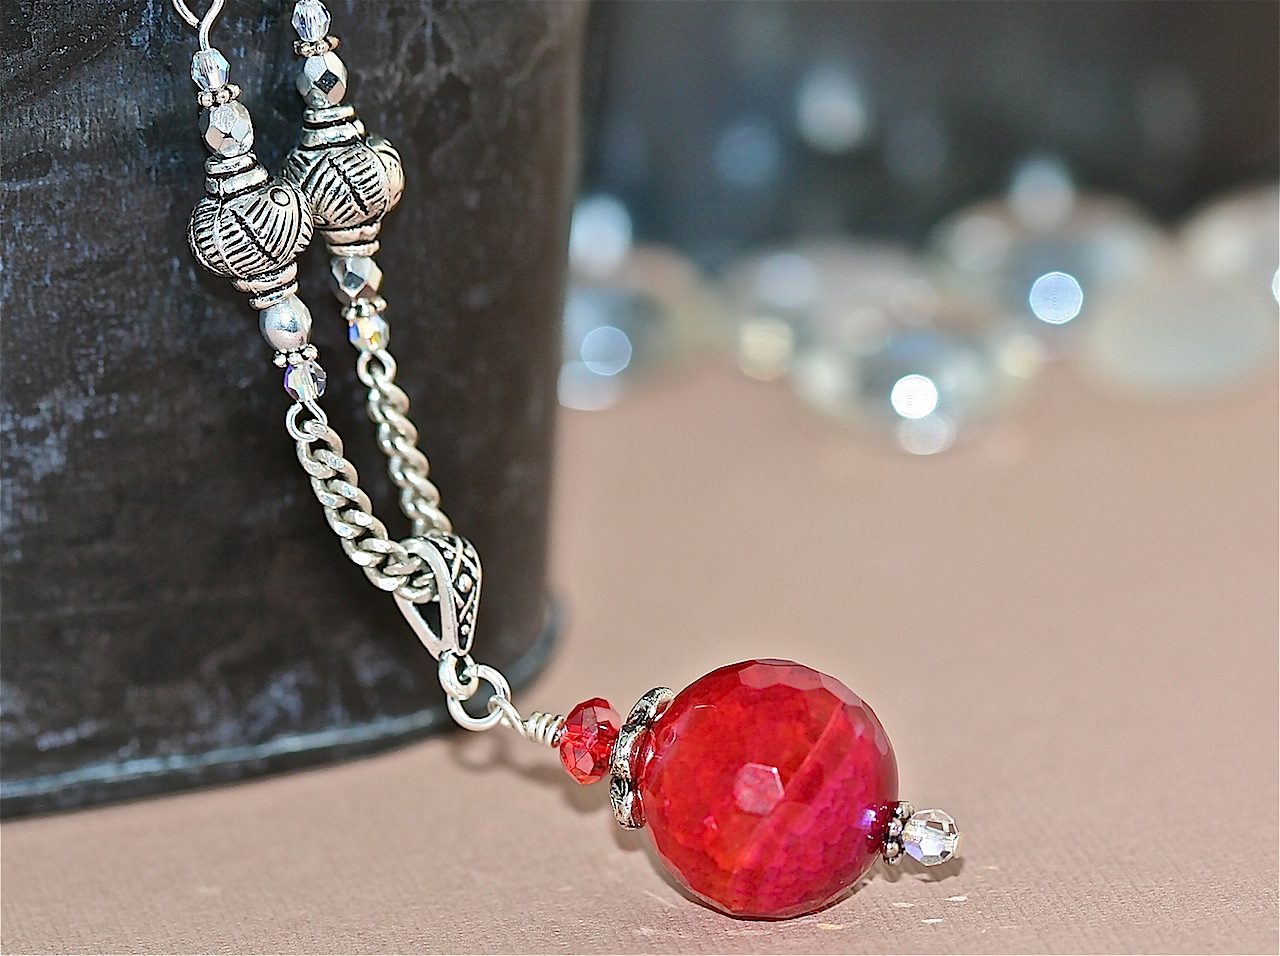
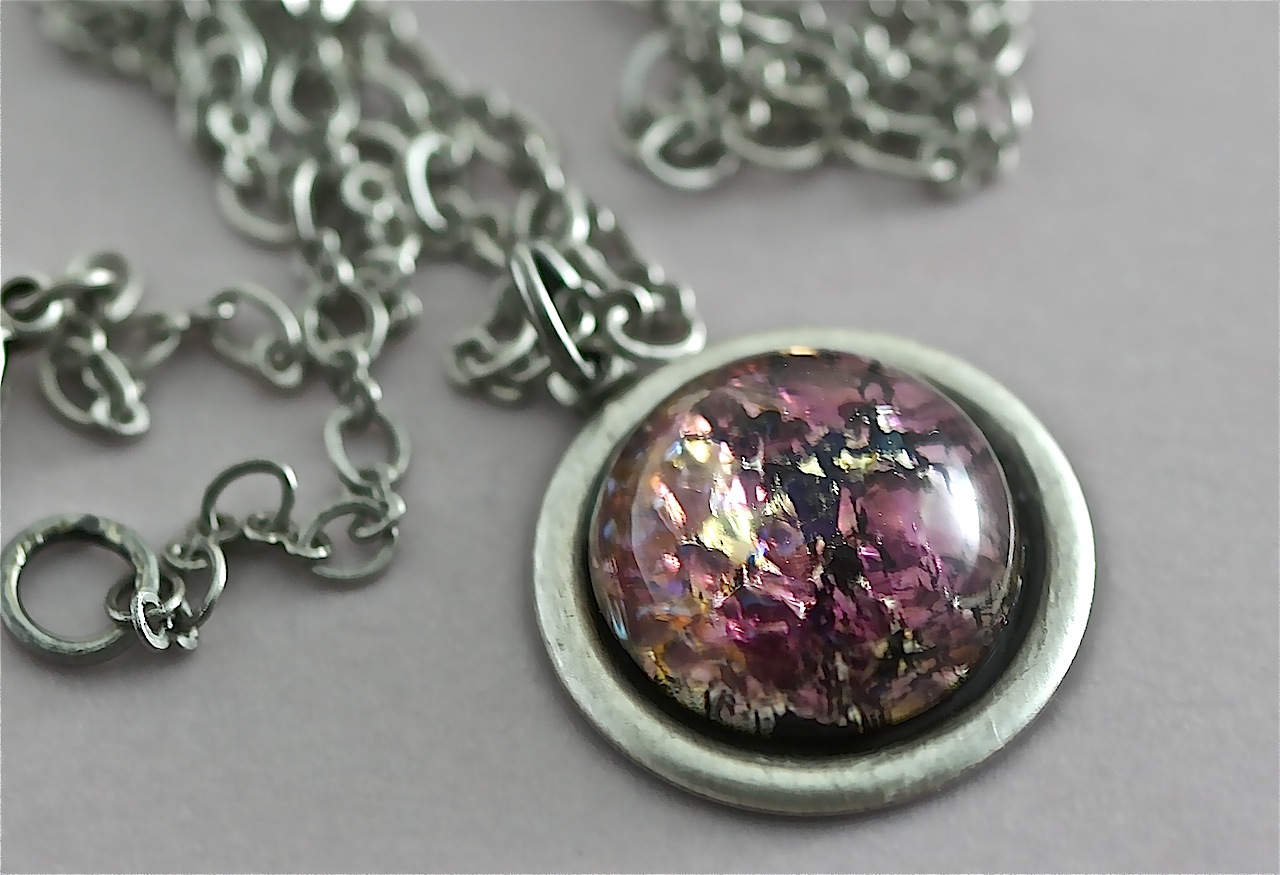
7. Now you are ready to place your pendant on a chain or cord and proudly wear!

Here are some collage pendant I recently made and have for sale on Etsy at DJAjewels.etsy.com:

Victorian Beauty Art Nouveau Pendant:  This pendant features an Alphonse Mucha image of a Victorian era woman encircled  within an antiqued silver collage pendant.  Hangs simply on an antiqued silver chain.


Vintage Roses Circle Collage Pendant :  Nostalgic image of vintage roses encircled within an antiqued silver collage pendant.  Suspended on delicate antiqued silver chain.


Antiqued Gold Bluebird Pendant :  Circle collage pendant featuring a delightful pair of bluebirds tending their nest.  Nest has four eggs including one surprise golden egg.  Collage image is set into  an antiqued brass frame and hangs simply from a 22K antiqued gold plated chain.


Art Nouveau Mucha Pendant :  Art Nouveau style pendant featuring an Alphonse Mucha image of  a lovely Victorian era woman.  Simple yet elegant antiqued brass frame  forms a golden halo around the beautiful young woman.  Hangs from an antiqued brass chain.