Sunday, January 30, 2011

Beaded Eyeglass Chain Tutorial - Jewelry That Has Purpose

This weekend I made something for myself - a beaded eyeglass chain.  As I was making it, I decided to take some photos and post a tutorial on it.  Beaded eyeglass chains can be more than just something to hang your glasses from - they can be beautiful pieces of jewelry!

For my project I wanted a vintage style design, so I used black gunmetal chain, jet black Czech glass beads, and a Victorian style antiqued silver drop as my eyeglass loop.

Materials:

  • Chain - I used black gunmetal rollo style with 3mm links
  • Czech glass beads in jet black - two 10mm and four 6mm size for this design
  • Gunmetal wire for wire wrapping - I used 20 gauge
  • Antiqued silver Victorian style drop
  • Two antiqued silver jump rings
Tools:
  • Round nose and needle nose pliers
  • Wire cutters
  • Emory board or fine sandpaper
Steps:

1.  I selected a Victorian style antiqued silver drop for my eyeglass loop, but it was longer than what I wanted for my design.  Remember it is always okay to customize a component to suit your tastes or the needs of a particular project.  To modify this piece, snip off the top using your wire cutters.  Use a nail file or sandpaper to smooth any rough edges after cutting.  This piece is sold by Vintage Jewelry Supplies - one of my favorite on-line jewelry supply sources.

Original and Modified Component

2.  Now decide how long you want your finished eyeglass chain - I decided on a 29 inch length which will slip easily over my head so no clasp is needed.  Then cut your sections of chain.  I used six 2-inch pieces of chain and one longer 12-inch piece for the middle part which will drape around the back of the neckline.

3.  Cut six pieces of wire into 2 1/2 inch lengths.  Now you are ready to wire-wrap your beaded links.  I like to wire-wrap my links directly to the chain for added security - but you can also use jump rings to attach them.  To bead the links directly into the chain, make a simple loop, then before wire-wrapping it, slide one end of a piece of chain onto the loop.  Then wire-wrap the loop, add your bead, then repeat for the other end, making sure you attach the next piece of chain to the loop before wire-wrapping.


4.  Continue making wire-wrapped links and connecting all pieces of chain.  For this pattern, you will end up with a long piece of beaded chain ready to connect to your eyeglass loop.

5.  Now connect the two loose ends to your eyeglass loop using jump rings.


Here is the finished design ready to wear:


This project can be modified and adapted into many different designs and patterns - just use your imagination!

Be sure to visit my Etsy shop to see more beaded eyeglass chains:

Sunday, January 23, 2011

Valentines Day Facts and Trivia

Valentine's Day is one of the most popular and well-celebrated holidays in the U.S. and the world.  I did a little research on the history of this holiday and found some interesting facts along the way!


History of Valentine's Day:
Ever wonder how Valentine's Day came to be?  Well, truthfully no one knows for sure and there are many stories and theories regarding the origin of Valentine's Day.  One popular hypothesis is that it began during the Roman Empire era under the reign of Claudius II, 270 AD.  Since the emperor thought that single men made better soldiers than married men, he forbade any soldiers to wed.  One bishop, however, performed secret wedding ceremonies against the emperor's wishes.  Bishop Valentine was jailed and eventually executed (on February 14, 270 AD) for his crime, but while in jail he wrote a love note to the jailor's daughter and signed it "From your Valentine" - an expression that, of course, eventually became a common Valentine's Day phrase.

Interesting Facts and Trivia:

  • Think that only men buy flowers on Valentine's Day?  Think again!  While 73 percent of people who buy flowers for Valentine's Day are men, 27 percent are women, and 15 percent of U.S. women send themselves flowers on Valentine's Day!
  • But women buy a lot of Valentine's Day cards - 85 percent of all Valentine's Day cards are purchased by women.
  • While Christmas is the largest seasonal card-sending Holiday, Valentine's Day is second with about 1 billion Valentine's Day cards being sent.
  • About 64 percent of U.S. men make romantic plans for Valentine's Day.
  • Cupid became associated with Valentine's Day because he is the son of Venus, the Roman god of love and beauty.  According the Greek mythology, Cupid used magical arrows to inspire feelings of love.  Many a Valentine card shows Cupid holding his bow and arrow.
  • During the late 1800's of the Victorian era, Valentine's Day cards became quite popular.  Many of these cards were considered to be indecent and obscene and many countries banned the exchange of Valentine cards.  The Chicago Post Office rejected more than 25,000 cards.
  • Today the average American consumer spends about $123.00 on Valentine's Day gifts.


Information links:
SheKnows.com
corsinet.com
ok50.com
AssociatedContent.com

Saturday, January 22, 2011

VALENTINES DAY SALE

Everything in my Etsy shop is now on sale for 20% off right now through Sunday January 30!

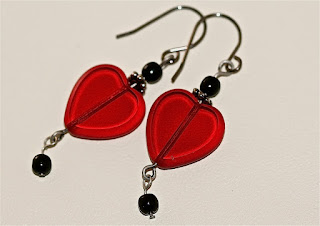
Check out these earrings I made just for Valentine's Day:

Valentines Day Red and Black Gothic Style Earrings

These earrings - and EVERYTHING in my shop - now marked down 20%.  So shop now:

I have an upcoming post on "INTERESTING FACTS ABOUT VALENTINES DAY" so check back soon!

Sunday, January 9, 2011

DIY Tutorial How To Make A Collage Pendant

Create a collage pendant for yourself - or for a gift - using this simple tutorial. Making a collage pendant is not difficult, but does require some time and thought. Here is the process I use:

Supplies And Materials: 


  • Image or photo
  • Pendant frame
  • E-6000 glue
  • Mod Podge brush-on sealer
  • Aleen's Acrylic Spray Sealer
  • Glaze - I use Diamond Glaze
  • Scissors and an Xacto knife - or a paper punch
  • Toothpicks or wooden craft sticks
  • Waxed paper

Supplies & Materials

1. First select your pendant shape and style - circle, oval, square, rectangle. Decide on either a simple frame or an ornate one with fancy edging. Since I like vintage style jewelry, one of my favorite places to purchase frames is VintageJewelrySupplies.com.  For this project, I used an antiqued brass setting with rope edging which will accommodate a one inch circle shape.

One Inch Circle Pendant Setting

2. Next, select your image to fit the frame. You can cut out images from wrapping paper, magazine photos, and greeting cards. Or you can purchase digital collage sheets with images already sized and shaped for common pendant frames. You can find a wide variety of pre-designed collage sheets from various sellers on both ArtFire and Etsy.  For the pendant in this tutorial, I am using a digital image from a collage sheet that I purchased from Etsy seller DigitalPerfection.

3. Prepare your image. If you are printing out a collage sheet or other image from your computer, first be sure to use the best quality settings for your printer. I find printing on matte photo paper rather than glossy works best. Next seal your image to prevent the ink from running and smearing during gluing and glazing later - I use Aleene's Spray Acrylic Sealer which can be purchased at craft stores such as Michael's - you can choose either a matte or glossy finish (both work fine.)  I usually spray an entire collage sheet of images, let it dry at least 15 minutes, then repeat the process for a total of two applications. 

4. Cut out your image. If you are "free styling" (not using a pre-sized and shaped" collage sheet) then make a template of your shape by tracing the shape on a piece of paper - preferably thick cardstock type. Then cut out the shape leaving a circle opening (or whatever shape you're using) in the paper. Then place the template over your desired image, trace with a pencil and cut it out. Leave about 1/8 inch around the edge to trim later - this makes for easier handling. Use a craft knife or xacto knife to cut your image - be careful as they are quite sharp!

A quicker easier method for cutting your image is to purchase a paper punch at a craft store such as Michael's. These come in standard one and two inch circles as well as ovals, squares and many other shapes. I recommend this method if you are going to be making a number of pendants.  The cut out image will have cleaner finished edges than with using scissors.

A Paper Punch Gives Cleaner Finished Edges Than Scissors
5.  Brush on a coat of Mod Podge to further seal your image.  I usually lay my cut out images on some wax paper, then squirt a bit of the Mod Podge onto the wax paper.  Use a small paint brush to apply the Mod Podge onto the image.  Below I am preparing several images at one time.  Let the Mod Podge dry about 15 minutes.

Brush on Mod Podge sealer

6. Now glue your cut out image to the pendant frame. I use E-6000 glue (also found at craft stores such as Michael's.)  Place a small amount of glue on the back of the image using a wooden craft stick or toothpick.  Then press the image onto the frame. Use the toothpick or small wooden pointed craft stick to clean off excess around the edges. There is no harm if you do leave some around the edges since E-6000 dries clear and excess can be cut off later with your craft knife. E-6000 becomes tacky in 2 minutes and begins to set in 10 minutes - but takes 24 to 72 hours to fully cure. After drying, you can trim the edges of your paper if needed with your Xacto knife - if you used a paper punch, this step is usually unnecessary.

Use E-6000 Glue For Gluing Your Image
Place Image With Glue On Back and Press Into Setting

7. Now it is time to apply glaze to seal and protect the image. Be sure to allow the glue from step 5 to dry sufficiently - I usually allow several hours (4 hours or longer.) Although not fully cured yet, this is enough time for proceeding.

I use Diamond Glaze which can be purchased at various sites on-line - even Ebay.

Applying the glaze is a bit tricky but not overwhelmingly so. The tricky part is to avoid bubbles.  Place your pendant on a flat surface where it will be able to sit without being disturbed for at least 24 hours. I use a flat chopping board with waxed paper placed on top for easy clean up.  Squeeze out a small dab of the glaze onto the waxed paper to expel any bubbles. Then without turning the bottle back upright and without completely releasing your "squeeze" on the bottle, immediately squeeze the glaze onto your image - I start from the center and work my way outward in a circular motion. I have found by trial and error that if I don't completely stop squeezing the bottle after placing a drop on to the wax paper, it prevents air from getting sucked back in and creating air bubbles. If air bubbles do develop, pop them with a needle or even your fingernail.

Apply Diamond Glaze to Image

8.  Now let the glaze dry and cure. It will be sufficiently dry to carefully move after 24 hours, but takes 72 hours before fully curing. If not fully cured, you can leave smudges and indentations on your glaze with handling.

Finished Glazed Collage Pendant

9. Now you are ready to add a jump ring or bail and place your pendant on a chain or cord to proudly wear!

Here is a finished pendant I created, then added an antiqued gold bail and antiqued brass chain:

A Finished Pendant With Bail and Chain
Happy pendant making!

Be sure to visit me at:
Etsy
Facebook

Saturday, January 1, 2011

How To Oxidize Silver

Recently I ordered a number of jewelry supplies.  When I received my order, I realized that the antiqued silver bails I ordered were not "antiqued" but were bright silver.  I meant to send them back and get the antiqued version but got busy with the Holidays and did not.  So, I thought why not "antique" them myself?  I had read about this process but never tried it before.

First, one should understand how this process works.  An antiqued finish occurs on silver because tarnish results from a process called oxidation.  Silver will oxidize naturally when exposed to air for long periods of time, but this process can be hastened if you want to create the darkened patina that gives an item an older more vintage style appearance.  Silver will oxidize when it reacts with sulfur.  This reaction produces silver sulfide which causes a darkening and blackening of the silver.

One can elicit this reaction by either using a hard boiled egg or by using a product called liver of sulfur.  Liver of sulfur can be purchased at jewelry and craft supply stores and many on-line sites.  Since I am a beginner in this process, I used the supplies readily at hand - a hard boiled egg and a plastic bag.

Materials:

  • Sterling silver or silver plated items
  • Hard boiled egg
  • Plastic bag with can be sealed
  • Polishing cloth

Procedure:

Gather items to oxidize.  In my case, these were a handful of bright silver plated bails.
Before Oxidation
Place hard boiled egg into a plastic bag and seal - no need to peel the egg although this might make it easier to chop.  The sulfur is actually in the yoke so theoretically all you need is the egg yolk.
Hard Boiled Egg in Sealed Plastic Bag
Mash the egg within the plastic bag.  Since I did not peel the egg, the easiest way I found was to simply "stomp" it lightly with my foot a few times.  If you have peeled your egg, you can probably just use your hands.
Mashed Egg in Plastic Bag
Next, open your bag and place the item(s) to be oxidized.  Reseal the bag and watch as the process begins.  The longer you leave the silver within the bag, more discoloration will be produced.  I left my silver bails in the bag about 15 minutes.  I also repositioned and turned the bag over several times during that 15 minutes to make sure all surfaces were exposed to the sulfur.
See the Silver Oxidizing Within Bag
When desired level of oxidation is achieved, remove the items and rinse off to remove any pieces of egg.   Next dry the items and examine them.
After Oxidation

Next, polish with a soft jewelry cloth - this removes the "excess" tarnish and restores the shine.  The more you rub with the cloth, the more tarnish you will remove.  See the difference in these close-up photos of a bail after oxidation and polishing compared with a bail before oxidation.

After Oxidation and Polishing


Before Oxidation
I am quite pleased with the results of my experiment, though I will likely purchase some liver of sulfur to try as well.  If interested, HowToMakeJewelry.com provides a nice tutorial on using liver of sulfur.

To see finished jewelry using some of these oxidized items, be sure to visit my shops on ArtFire and Etsy!
Azure Blue Glass Gem Pendant - on Etsy
This tutorial has been featured on FaveCrafts.com!